Introduction to SSH and IoT Devices
Welcome to the world of remote management, where you can control your IoT devices from anywhere with just a few clicks. Let's dive into how you can leverage the power of Windows 10's command line to establish a secure SSH connection to your IoT devices without breaking the bank. Imagine being able to configure and troubleshoot your smart devices from the comfort of your home or even while on vacation. That's exactly what we're going to show you today.
Why Use SSH for IoT Devices?
SSH, or Secure Shell, has become the gold standard for secure remote access—and for good reason. It encrypts your data during transmission, ensuring that no one can intercept your sensitive information. Whether you're a hobbyist tinkering with smart home gadgets or an IT professional managing industrial IoT systems, mastering SSH on Windows 10 can save you time, enhance security, and streamline your workflow.
What You'll Need
Before we dive into the setup process, let's make sure you have everything you need. First, you'll require an SSH client like PuTTY or Windows' built-in SSH functionality. Next, you'll need the IP address of your IoT device, along with the login credentials. Lastly, ensure your IoT device is properly configured and accessible from your network. With these basics in place, you're ready to roll.
Read also:Top Ai Tools For Undressing Images A Comprehensive Guide
Setting Up SSH on Windows 10
Step 1: Enable the OpenSSH Client
Windows 10 comes with a built-in OpenSSH client, but you may need to enable it first. Here's how: Open the Start menu, go to "Settings," then navigate to "Apps" and select "Optional Features." Click on "Add a feature" and search for "OpenSSH Client." Once you've found it, click "Install." Voila! You're now equipped with the tools needed to establish SSH connections.
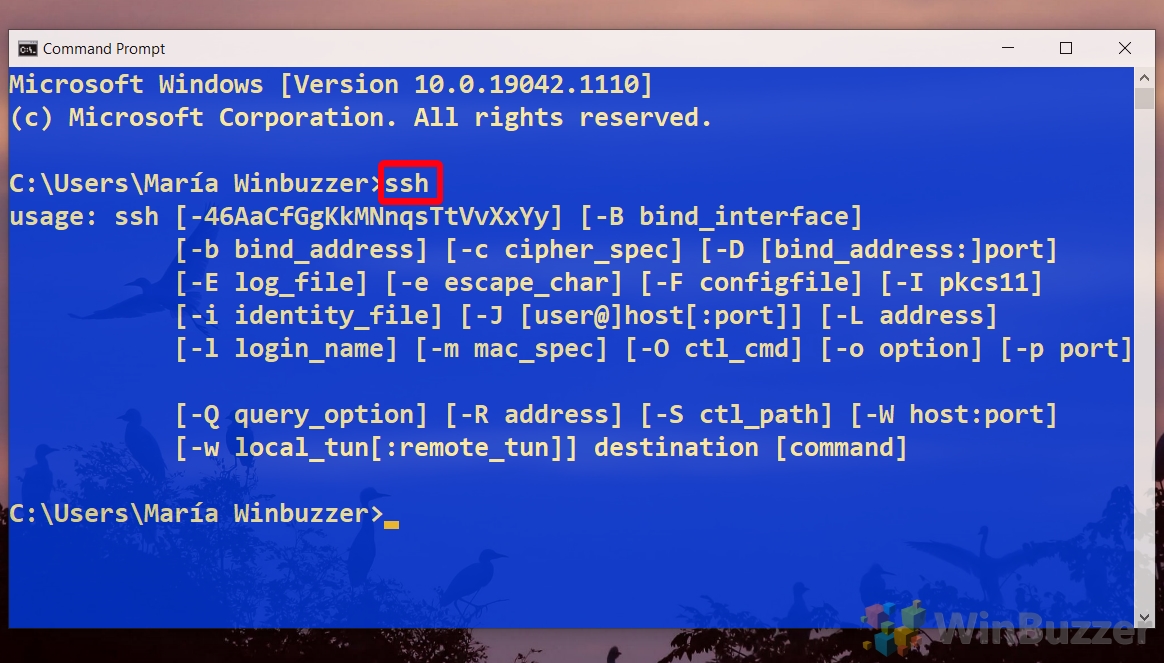
Step 2: Open Command Prompt or PowerShell
Now that the OpenSSH client is installed, it's time to fire up the command line. Press the Windows key + R, type "cmd," and hit "OK." Alternatively, you can use PowerShell, which offers more advanced features. In the command prompt or PowerShell window, navigate to the OpenSSH directory by entering the appropriate command. This step ensures you're in the right location to generate your SSH keys.
Step 3: Generate Your SSH Key Pair
Once inside the OpenSSH directory, it's time to create your SSH key pair. Run the following command: `ssh-keygen -t rsa -b 4096 -C "your_email@example.com"`. This will generate a secure RSA key pair tied to your email address. You'll be prompted to choose a location to save the keys and set a passphrase for added security. Remember, this key pair is your digital ID, so keep it safe!
Connecting to Your IoT Device
Step 1: Initiate the SSH Connection
With your SSH keys in place, it's time to connect to your IoT device. Use the following command in the command prompt or PowerShell: `ssh username@ip_address`. Replace "username" with your IoT device's login credentials and "ip_address" with the actual IP address of your device. If this is your first time connecting, you'll be prompted to accept the device's public key. Simply type "yes" to proceed.
Step 2: Authenticate and Access
After accepting the public key, you'll be prompted to enter your password or use your SSH key for authentication. If you opted for an SSH key, the connection will be established automatically. At this point, you've successfully connected to your IoT device and can begin managing it remotely. Whether you're troubleshooting a smart thermostat or monitoring industrial sensors, SSH gives you the power to do it all.
Advanced Tips for Secure Connections
Configure Port Forwarding on Your Router
For remote access from outside your local network, you'll need to configure port forwarding on your router. This involves directing incoming traffic on a specific port (usually 22 for SSH) to the IP address of your IoT device. Consult your router's manual for detailed instructions. Once set up, you'll be able to connect to your IoT device from anywhere in the world.
Read also:Where Jd Vance Calls Home A Journey Through His Real Estate Story
Use Strong Authentication Methods
While passwords are convenient, they can be vulnerable to brute-force attacks. For maximum security, consider using SSH keys or certificate-based authentication. These methods provide an additional layer of protection, ensuring that only authorized users can access your IoT devices. Plus, they eliminate the need to remember complex passwords.
Conclusion
By following the steps outlined in this guide, you've now mastered the art of SSH for IoT devices on Windows 10. You've learned how to set up secure connections, troubleshoot common issues, and implement best practices to protect your devices. Whether you're managing a smart home or overseeing an entire network of industrial IoT systems, SSH empowers you to do it all with confidence and efficiency.
As technology continues to evolve, the ability to remotely manage IoT devices will only become more critical. With SSH as your trusty tool, you're well-equipped to handle whatever challenges come your way. So go ahead, experiment, and discover the endless possibilities of remote device management. The future of IoT is here, and you're ready to embrace it.